Virtual TimeClock Knowledge Base
Assigning Activities to Groups
The activity feature in Virtual TimeClock gives you the ability to create any number of activities, allowing your workers to select a unique activity name, job number, or location for all TimeClock entries recorded throughout a shift. This allows employers to easily track labor costs for specific tasks, job, client, or business unit at the same time workers are recording their employee timecard hours. If you're new to the topic of activities, see our overview of activity tracking article.
Note: Before assigning an activity to a group, you must first create your activities.
When a new activity is created, it is automatically assigned to all display groups. Follow these steps to assign specific activities to your display groups:
- Select Turn Administration On from the File menu.
- Select Display Groups from the Configure menu.
- Select your Display Group and click the Activities tab to view current activities.
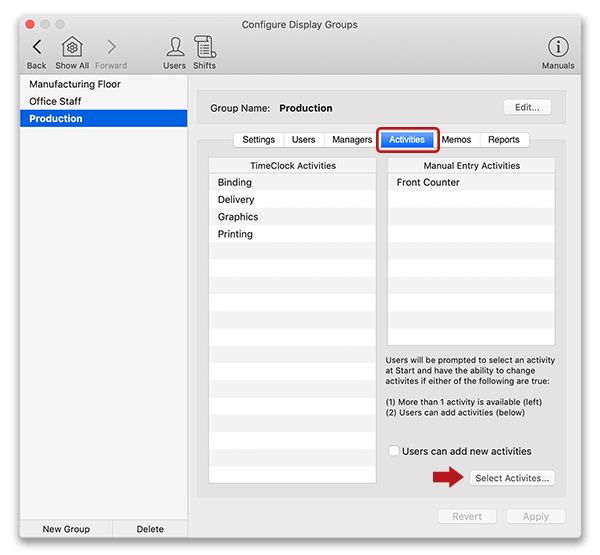
- To modify activities, click the Select Activities button.
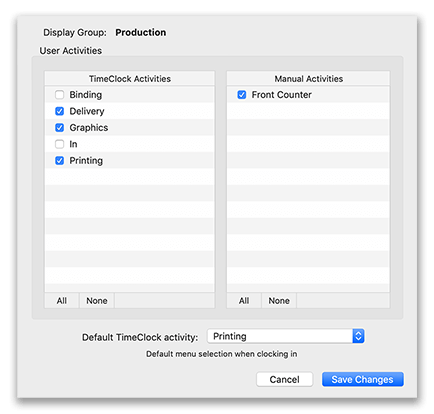
- The activities listed in the TimeClock Activities column will be available to users when they clock in or change activities during the day. Please note that when an activity is available for users when clocking in, then it is also available when adding manual entries. The activities in the Manual Activities column are used exclusively for entering manual entries.
- Choose the default time clock activity by clicking the popup menu and selecting an activity. The default is ‘In’, but any TimeClock activity can be made the default. The default activity is used to simplify the clocking in experience for users. If users of a display group almost exclusively use a single activity, we recommend making it the default to simplify clock in.
- If only one activity is selected with a checkmark in the TimeClock Activities column then it will be the default for users clocking in.
- Click Save Changes and return to the Activities tab of the Configure Display Groups window.
- If you wish to allow employees to add activities, check the box for Users can add new activities. Allowing users to add activities is helpful for tracking jobs or cases that occur dynamically. Once an employee adds a new activity, that activity will also be available to other employees in the display group. You can always make the activities inactive when they are no longer used.
Note: If multiple activities are added by mistake, you can reassign a different activity to the entry, so the activity added by mistake can be deleted. You must reassign a different activity to timecard entries because an activity cannot be deleted if it is assigned to a timecard entry.
- With activities successfully assigned to users, your employees can start tracking their time with activities. Learn more about how employees can clock in using activities >
Manage Activities
The following guidelines will help ensure consistent and accurate activity tracking in Virtual TimeClock:
- Explain the importance and proper use of activities to your TimeClock users. It often takes practice for employees to get in the habit of using activities correctly. It often takes a bit of encouragement and consistent correction from management to accurately track activity time.
- Make activities that are no longer in use inactive. Activities that are made inactive are removed and unavailable to users. Don't worry, making activities inactive does not remove the time clock data. To simplify the list of activities in the Configure Activities window, follow these steps to only view active activities:
- Select Turn Administration On from the File menu.
- Select Activities from the Configure menu.
- At the top of the activity list, click the header and choose Active Only.
- To see all activities, select All Activities from the header.
- Ensure that new activities are added and/or limited to the correct display groups.
- Select Turn Administration On from the File menu.
- Select Activities from the Configure menu.
- Click Edit Group Activities in the right column.
- Make any necessary changes by selecting the Display Group in the left column and clicking Select Activities.