Assigning & Using Activities
Activities are used by TimeClock users, managers or administrators when clocking in or changing tasks throughout a workday. In order to start using activities, you must first create your activities and then assign activities at the display group level to one or more groups of users.
Using Activities within the Time Clock
Activities are selected when users clock in, as they change activities during their shift, or activities are manually changed after the entry has been recorded. Users can assign time to an unlimited number of activities throughout a workday.
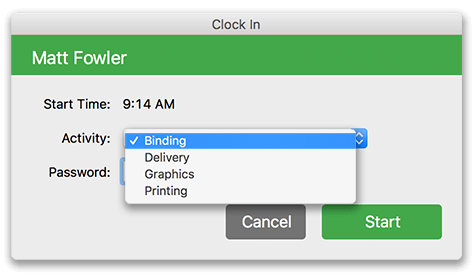
Clocking In
When users start their shift, they will be prompted to select an activity from the Activity pop up menu. The default activity can be set in the Display Group settings. After choosing an activity, workers will click Start.
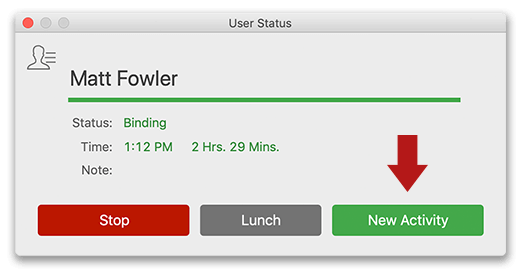
Changing Activities
To change an activity at any point during the workday, a user will return to the time clock, click Change Activity, choose the appropriate activity and click Start.
Note: If the PIN or passcode interface is in use, workers will enter their PIN/Passcode and select New Activity from their User Status window.
Adding a Manual Entry
Users with permission to add manual entries can do so from their User Status window by selecting the menu in the top left corner and clicking Add Manual Entry. Users must choose an activity for the manual entry from the Activity popup menu. The option to add manual entries is set by the TimeClock administrator. An administrator must follow these steps to give a user access to add a manual entry:
- Select Turn Administration On from the File menu.
- Select Display Groups from the Configure menu, click Display Groups.
- Choose the display group in the left column and click the Users tab.
- Check the boxes for Create Manual Entries and/or Edit Entries to grant users permission to add entries.
- Click Apply to save changes.
Using Activities as a Manager or Administrator
By definition, Administrators have permission to do everything in the TimeClock. Managers are assigned at the group level and must be granted permission to do actions such as adding or editing entries. Confirm the settings are correct in the Configure Display Groups window in the Managers tab.
Clocking Users In
When a manager or administrator clocks a user in while in administration mode, they also select an activity for the user before clicking Start.
Adding Entries for Users
Entries are added by administrators and managers while in administration mode. Here are the steps:
- Select Turn Administration On from the File menu.
- Select the Add Entry icon in the administrative toolbar on the In/Out Board.
- Within the Add Entry window, select the users and choose an activity from the popup menu.
- Click Create to save the entry.
Reporting Activities
There are several built-in reports as well as easily created reports for viewing recorded activity hours. Learn more about activity reports >