Creating Activities
When users select an activity at clock in or when changing activities, they are assigning their time to a specific task, job, project, or location. The first step to using the activity tracking feature in Virtual TimeClock is to create your activities.
Note: The Activities feature is available in Pro and Network editions.
Create a new activity:
- Select Turn Administration On from the File menu.
- Select Activities from the Configure menu.
- The default activity for when users clock in on the TimeClock is ‘In’. You can add more activities by clicking the New Activity button in the bottom left corner and give the new activity a unique name.
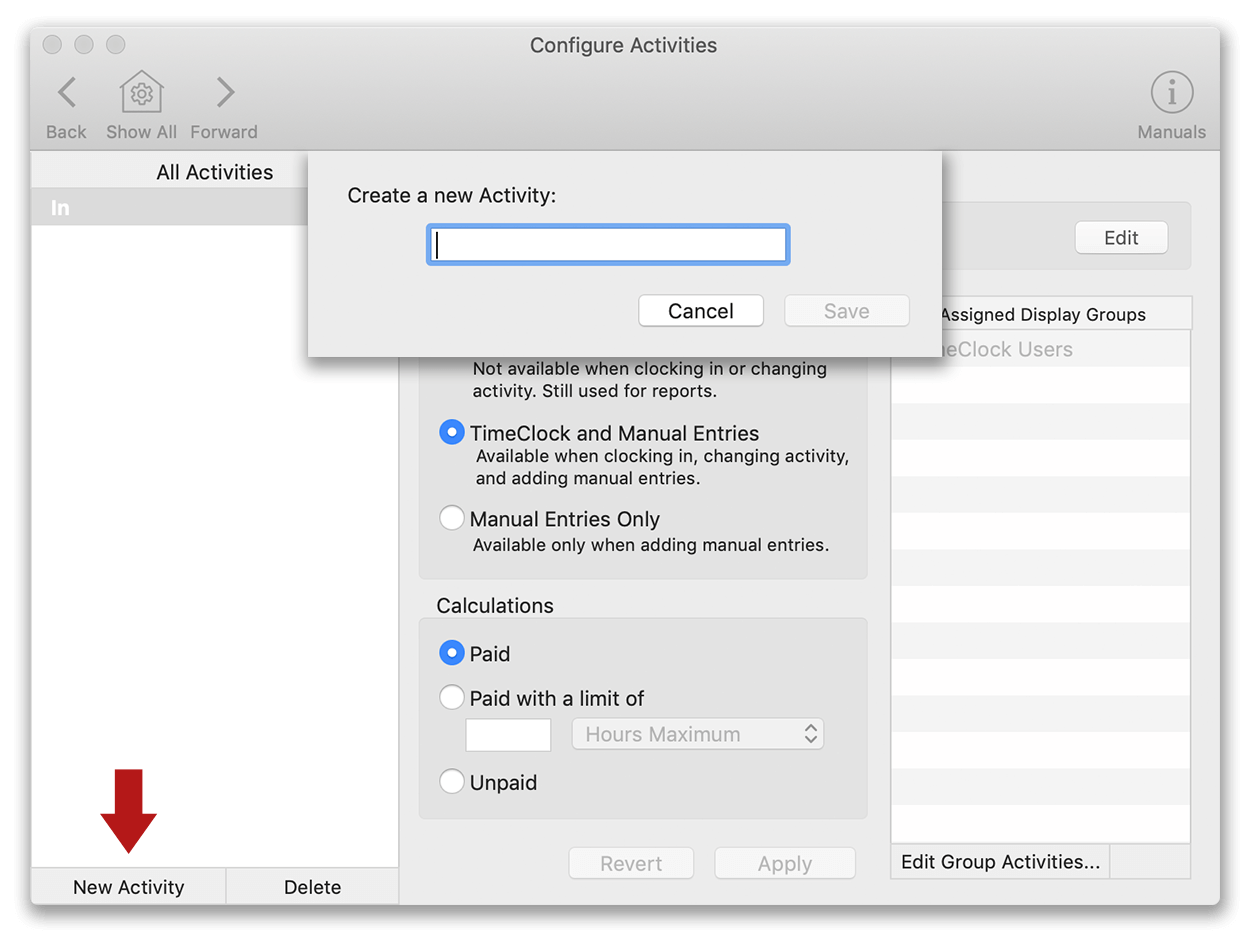
- The Status section determines how the activity will be used:
- Inactive: To keep your list of activities manageable, make activities for completed projects or jobs inactive. Making an activity inactive removes it from the selection of activities available to users at clock in while preserving the activity for reporting purposes. Limiting the activities list simplifies the clock in experience for users.
Note: An activity cannot be deleted if it is assigned to a timecard entry. In order to delete an activity, you must modify all timecard entries using the activity and assign another activity to the entries. Only then will the TimeClock allow you to delete an activity.
- TimeClock and Manual Entries: This status is for an activity that will be available to users when they clock in and/or change activities throughout the workday. Activities with this status can also be added as manual entries by those with permission to add entries.
Note: This is the proper setting for all activities you want available to your TimeClock users.
- Manual Entries Only: These activities are ONLY available when adding manual entries. Some examples of activities that companies often use with this status are things like jury duty, travel time, and off-site training. Users do not normally have permission to add manual entries.
Note: See the Users and Managers tabs in the Configure Display Groups window to grant permission for your users or managers to create manual entries.
- The Calculations section determines if the activity will be paid, unpaid or paid with a limit of time. Paid Breaks are often set with limit. So for instance, a worker who records an 18 minute Paid Break activity that is set to a limit of 10 paid minutes will record 10 minutes paid and 8 minutes unpaid time for this activity.
Note: Time spent on unpaid activities is displayed in a separate unpaid column on reports. Totaling your unpaid hours is an option.
- Select Turn Administration On from the File menu.
- Select Report Writer from the Configure menu.
- Choose the report in the left column then click Report Options.
- Check the box for Total Unpaid Hours.
- Click Save to apply changes.
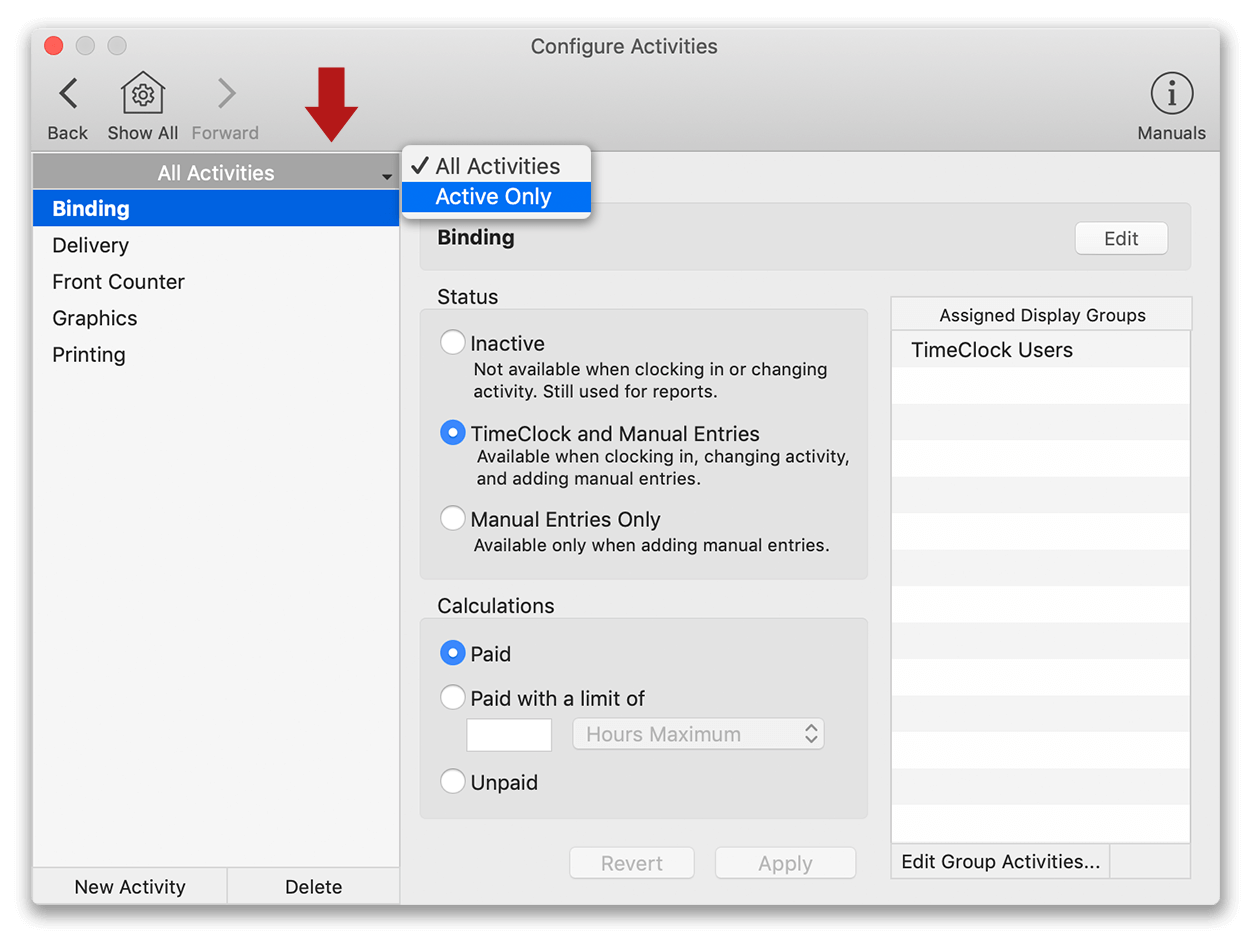
Filtering the activity list
You can filter the list of activities by clicking on the list header, by default the list will display All Activities. Choose Active Only to filter out any activities that have been marked as Inactive.
Once your activities are created, they need to be assigned to a group of users. When employees clock in or change activities throughout the workday, they will select an activity from the popup menu based on your activity settings. See additional instructions on how to assign activities to groups of users, how to use activities when clocking in, and activity reporting options in Virtual TimeClock.