Creating a New Shift
The Virtual TimeClock Shifts feature is a powerful tool for tracking employee tardiness and applying start, stop, and lunch rules to individuals or groups of users. Continue reading to learn how you can create a shift and start utilizing this powerful feature. If you have already created a shift and reviewed the settings, you can move on to assigning shifts to users.
Follow these steps to create a new shift:
- Select Turn Administration On from the File menu.
- Select Shift Rules from the Configure program menu.
- Click the New Shift button in the lower left corner and enter a shift name.
- Set the Shift Start and Stop times and enter the number of minutes for a lunch break.
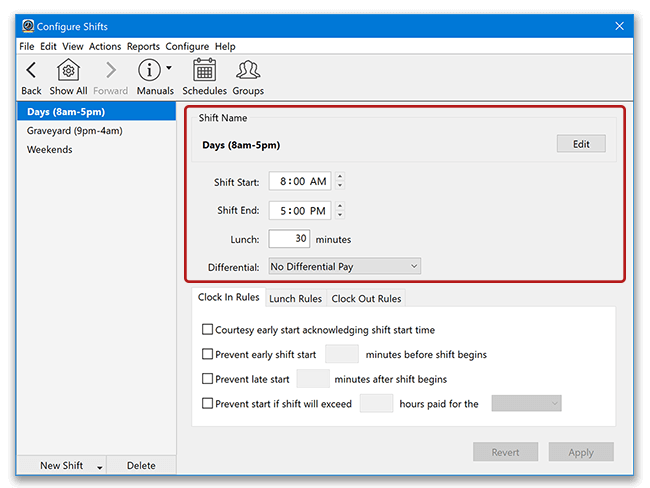
- Some businesses provide additional compensation for work performed during non-standard shifts. To enable a shift differential, select Hourly Percentage or Hourly Dollar Amount from the Differential popup menu and enter what an employee will earn for each differential hour worked. This will ensure job costing wages are totaled accurately.
Note: Hourly wages need to be entered into Virtual TimeClock and gross wages displaying on reports needs to be enabled in order for shift differentials to calculate correctly. See the Adding Users article for more information.
- Set any clock in, lunch, or clock out shift rules that you want enforced. There are many options for shift rules, so please review the articles below for specific information:
Note: If you're creating a shift with the sole purpose of tracking tardiness with the Late Arrival Report, then specific shift rules are not required. The only requirement is that users are assigned to a shift.
- Once you feel comfortable with the shift settings, follow the steps to assign shifts to users.
Changes made to shift rules generally begin taking effect the following day, once daily totals and shifts have been reset.