Automatic Scheduled Backups
Virtual TimeClock Pro and Network editions include an automatic scheduled backups feature to help you quickly and easily create regular backups of your time clock data. This article will explain how to set this feature up.
- For general information on Virtual TimeClock backups, see the Overview of Backups article.
- See our Manual Backups article for Basic Edition or if you need an immediate backup when moving your time clock.
Important Note: DO NOT save backups to the same computer as your TimeClock data. Damage or loss of the computer will cause you to lose your database and your backups.
Creating a Backup Schedule
To create an automatic data backup schedule within Virtual TimeClock:
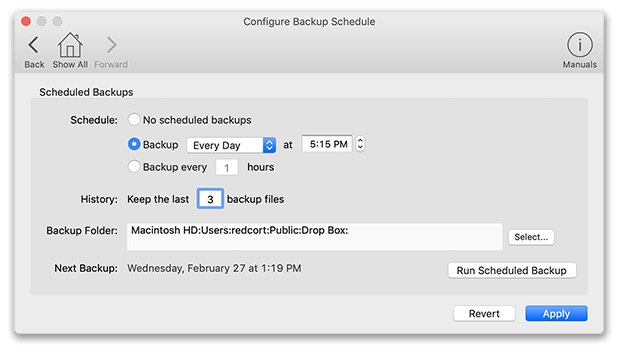
Virtual TimeClock Pro
- Select Turn Administration On from the File menu.
- Select Backup Schedule from the Configure menu.
- Click Select to set the Backup Folder location.
- Set the desired backup schedule frequency.
- Determine how many backups you want to keep.
- Select Apply when you’re satisfied with your scheduled settings.
- Click the Run Scheduled Backup button to test your backup settings.
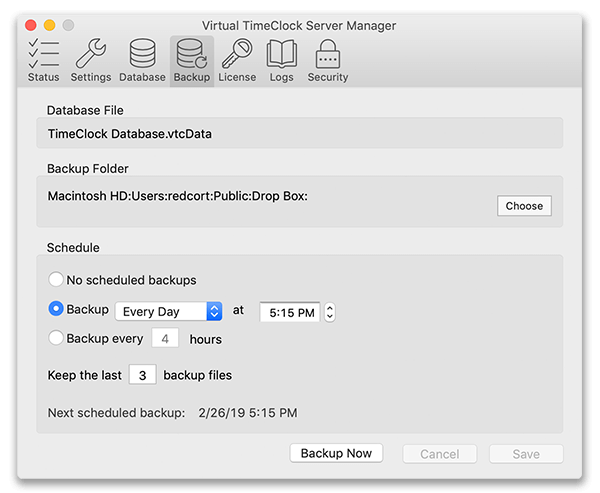
Virtual TimeClock Network
- Launch the Virtual TimeClock Server Manager program.
- Select the Backup option in the toolbar.
- Click Choose to set the Backup Folder location.
- Set the desired backup schedule frequency.
- Determine how many backups you want to keep.
- Select Save when you’re satisfied with your scheduled settings.
- Click the Backup Now button to test your backup settings.
It's important to periodically check your backups. See the Verifying Schedule Backups article to ensure that your backups are running as expected.
Note: If you move your TimeClock database to another computer then you will need to reset the backup schedule.