Virtual TimeClock Network Edition can be configured to allow offsite (remote) TimeClock clients to connect to your TimeClock Server. This allows you to use the time clock across multiple business locations, or to access your time clock data while away from the office.
Almost all business networks have a router that allows information to come and go to the Internet while preventing outsiders on the Internet from accessing the local network resources and data. The router is usually an inexpensive hardware device from companies such as Cisco, Linksys, or Netgear and is often provided by your Internet Service Provider (ISP). The key to remote access is to open up communication through the router on your server network to allow remote Virtual TimeClock Clients to talk to the TimeClock Server.
The following instructions explain how to set up Virtual TimeClock for remote access using either a Virtual Private Network (VPN) or port forward rule. If you’re not sure which connection to use, consult your IT professional.
A. Connect Using a Virtual Private Network (VPN)
This is the most secure type of remote connection because a VPN allows a computer to send and receive data across shared or public networks as if it is directly connected to the private network, which means it benefits from all the security of the private network. This is the recommended method for remote client connection. Your IT professional can tell you if you have a VPN already in place or help you set one up.
Computers on a VPN connect the same way as computers on the local network. To install and connect a TimeClock client, see Installing Virtual TimeClock Clients section in the Network Edition Install Guide for more information.
B. Connect Using a Port Forward
An alternative method of remotely connecting to your TimeClock Server is by opening a port on the Internet router at your TimeClock Server location. This is commonly known as 'port forwarding.' To use port forwarding, you must set a static IP address on your TimeClock Server computer and have your Internet Service Provider (ISP) assign a static public IP to your Internet account.
Note: You can find your current public IP address at any time by opening the Server Manager program and noting the Remote (Public IP) address in the Networking section of the Status tab.
To connect a remote Virtual TimeClock Client to your Virtual TimeClock Server using a port forward, follow these steps:
TimeClock Server Location
Virtual TimeClock Server Manager
- Launch Virtual TimeClock Server Manager and view the Status tab.
- Write down the Local (TimeClock Server) IP address under Networking.
Your Internet Router
- Access your router configuration settings by entering the router’s IP address into a web browser (for example 192.168.1.1) using a computer on the local network. If you do not know the IP address of your router, check the user guide for your router.
- Navigate to the Port Forwarding section, often found under Virtual Server or Firewall settings. Consult the user guide that came with your router for exact steps.
Note: A good resource for port forward guides is PortForward.com.
- Use the following information to set up a new port forward in your router:
- Select TCP for the protocol.
- Set the External or From port to 56777.
- Set the Internal or To port to port 56777 as well.
- Set the IP Address to the local IP address of the TimeClock Server. This is the address your wrote down from the Server Manager Networking status.
- Save the new configuration settings to activate the port forward.
Security Note: To maintain network security, configure the Access Control feature of your router (sometimes called "White Listing") to allow only specified list of devices or IP addresses to connect to your network. See the user's guide that came with your router for more information.
Remote Client Location
- Download and install Virtual TimeClock Pro Client or User Client from our download page. The Pro Client has administrative functions while the User Client does not.
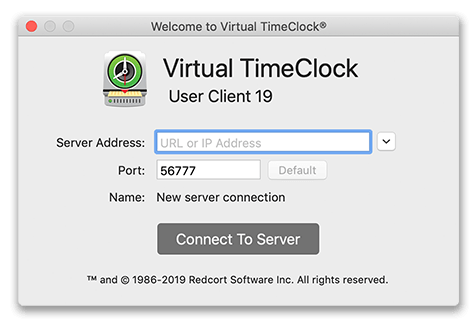
- Manually add your server location:
- Server Address = the Remote (Public IP) from your TimeClock Server Status tab.
- Port = 56777.
- Click Connect to Server and then login to your display group.

Virtual TimeClock will save the server login information so it can automatically reconnect to the TimeClock Server at next program launch.