Enabling and Managing Messaging
The Messaging feature in Virtual TimeClock allows employees and management to communicate in a self-contained, spam-free messaging system. This article will demonstrate how you can enable and manage the messaging feature.
Note: If you're new to this feature, see the Overview of Messaging article.
Enable Messaging Feature
Messaging is enabled by default for all new display groups for both users and managers. Follow the steps below to configure the feature according to your business needs.
- Select Turn Administration On from the File menu.
- Select Display Groups from the Configure menu.
Note: Only an administrator can alter display group settings.
- Choose a display group in the left column of the Configure Display Groups window.
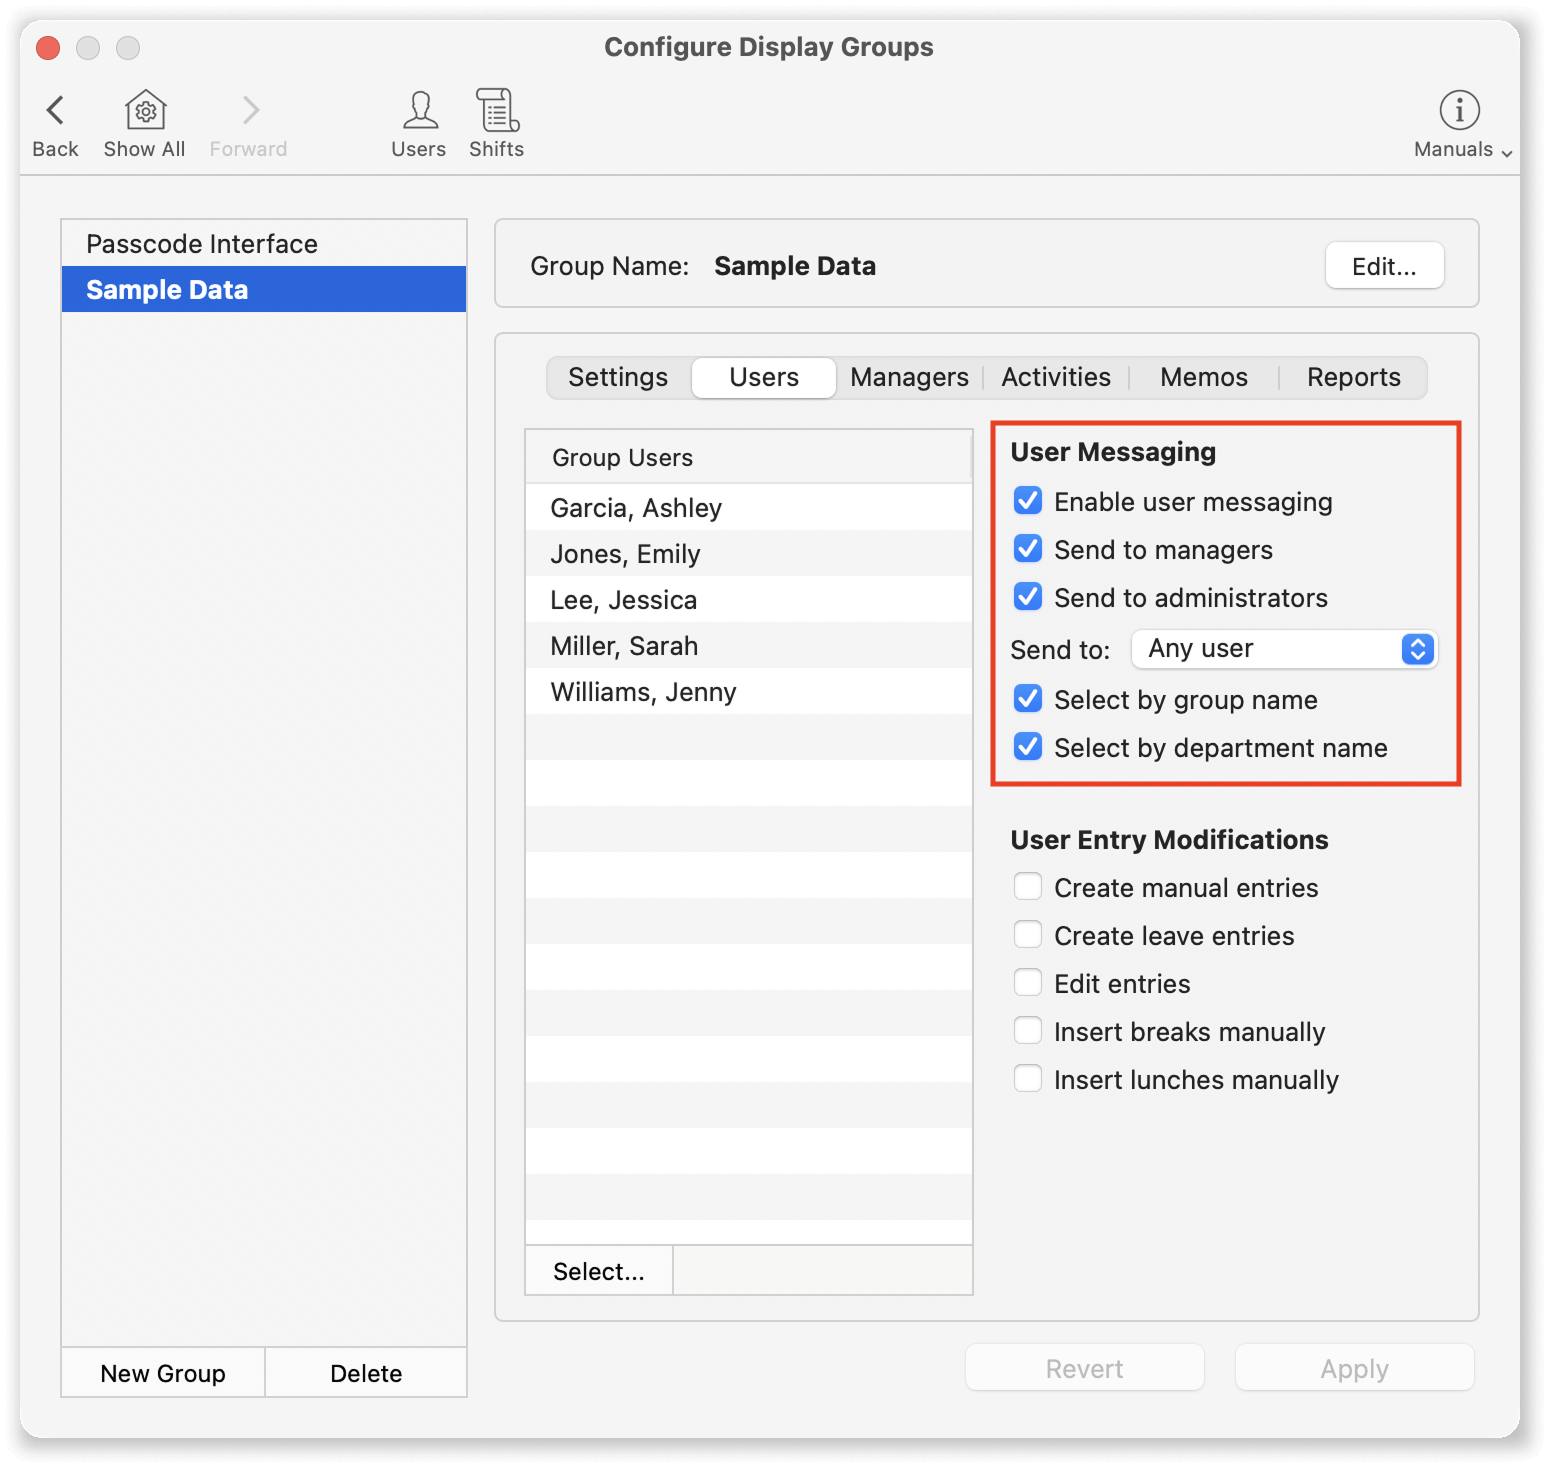
- Select the Users tab and check the box to Enable user messaging.
- To enable messaging for managers, choose the Managers tab, and check the same box.
- Select Apply to save the changes.
- Repeat these steps for any other groups.
Configure Messaging
You can configure messaging for each display group to allow or restrict permissions for various actions:
Send to managers:
If enabled, users can send messages to and reply to messages from their display group’s managers.
Send to administrators:
If enabled, users can send messages to and reply to messages from any TimeClock administrator.
Send to:
When user messaging is enabled, you can specify who users are allowed to message:
-
- No Users – Users cannot message other users; they can only message managers or administrators (if those permissions are enabled).
- User in this group – Users can only message others within their own display group.
- Any user – Users can message any TimeClock user across all display groups.
Select by group name:
When messaging all users is enabled, you can allow users to choose recipients by display group name.
Select by department name:
When messaging all users is enabled, users can also be allowed to select recipients by department name.
Using Messaging
Review the Sending and Responding to Messages Knowledge Base article to learn how to access messages in Virtual TimeClock.
Printing and Saving Messages
An unlimited number of messages can be saved in the time clock without slowing down Virtual TimeClock. Messages can be easily printed or saved as a PDF by opening the message and selecting the Print icon. To save a message as a PDF, choose Save to PDF in the print settings window. Messages remain listed in your inbox unless you archive, delete, or move them to a custom mailbox.
Deleting Messages
Messages that are deleted cannot be recovered, so inform your administrators, managers, and users to delete messages with caution. To delete a message click to highlight it then select the Delete icon in the toolbar.