Virtual TimeClock Support Blog
Trouble Saving Scheduled Backups to Shared Folder
If you're running Virtual TimeClock Network Edition on Windows and your scheduled backups are failing to save to a mapped drive or shared folder, this article may provide a solution. The Virtual TimeClock Server runs in the background as a Windows service and it's this service that performs scheduled backups, not the Server Manager program where you select the backup folder. This can become an issue if the default Windows services account does not have access to shares.
One symptom of this problem is that you can save manual backups to the desired folder, but scheduled backups are failing. You may see a note in the backup logs that says: The designated backup folder is not available. Follow the steps below to change the user account used by the TimeClock Server service.
Updating the TimeClock Server Properties
- Open Windows Control Panel, choose Administrative Tools and then select Services.
- Scroll down the list of services and locate Virtual TimeClock Server.
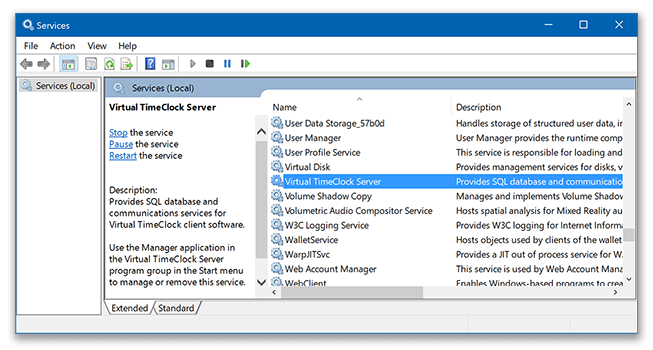
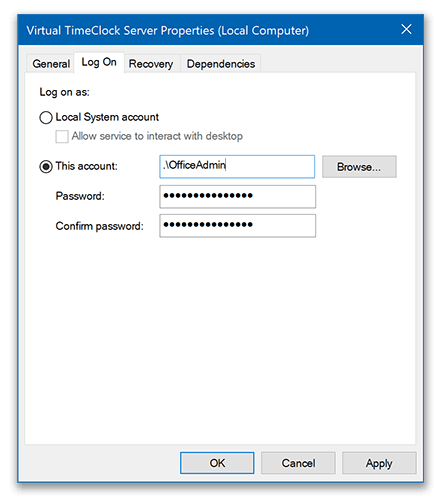
- Right-click the service, choose Properties and then click the Log On tab.
- Select This Account and enter the current user account details.
- Open the Virtual TimeClock Server Manager and choose Stop Service from the File menu.
- Once the service has stopped, choose Start Service.
- Select the Backup tab and test the scheduled backup.
If this solution does not work for you, there may be other permission issues that are preventing the TimeClock Server service from saving the backup to your network folder. For more information see the Overview of Backups article.