Virtual TimeClock Support Blog
Importing CSV files in Microsoft Excel
Virtual TimeClock provides a handy export tool that allows you to import timecard data into a spreadsheet program, like Microsoft Excel, for customized reporting and analytics. The export tool will save timecard data to a text file with the data separated by commas; commonly known as comma-separated values (CSV). This brief article will guide you through the process of importing a CSV file into Microsoft Excel.
Note: If you are new to exporting data from Virtual TimeClock, review our Export Tool Knowledge Base article for more information.
Opening a CSV file in Microsoft Excel
After creating a data export from Virtual TimeClock, follow the steps below to open your CSV text document in Microsoft Excel.
- Open Microsoft Excel and open a new document.
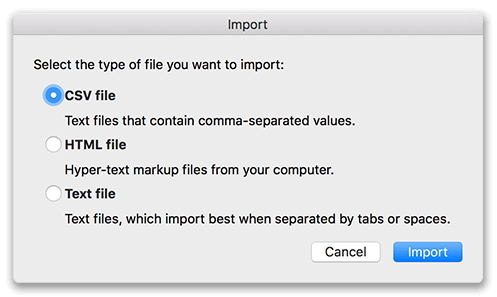
- Select Import from the File menu.
- For the type, choose CSV file and click Import.
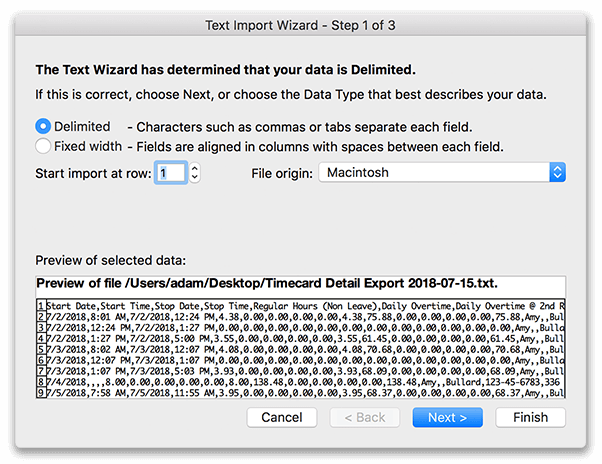
- Select your Virtual TimeClock text file and click Get Data.
- Select Delimited for the data type and click Next.
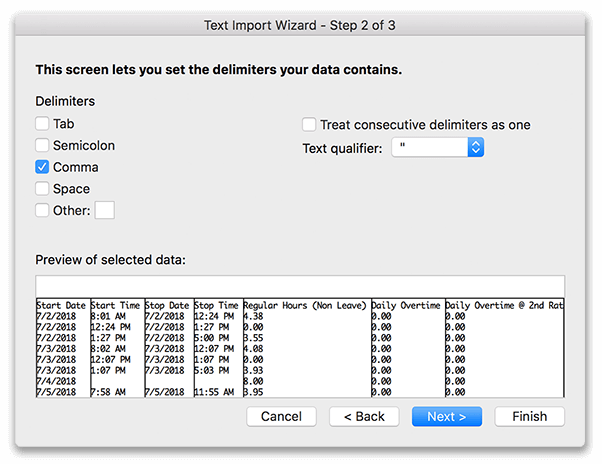
- Choose Comma as the delimiter and Next.
- Leave Column data format as General and choose Finish.
- Select the spreadsheet cell where the imported data will start.
Once your timecard data has been imported into Excel, there is no limit to the reporting and analytics you can create: payroll integration files, job costing reports, labor trends and much more.