Virtual TimeClock with Windows 10 in S mode
July 8, 2021
Are you getting this message when you try to install Virtual TimeClock on a new Windows computer?
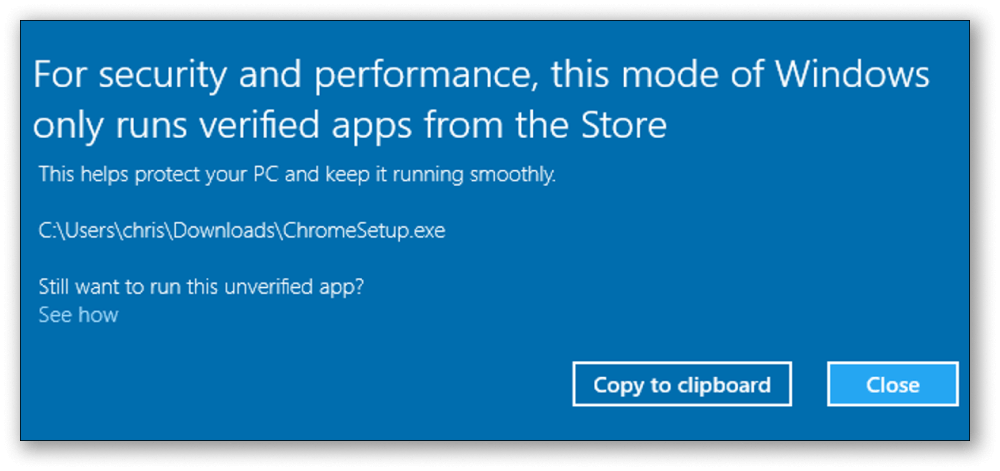 The message above means your computer is running Windows 10 in S mode. This is a version of Windows 10 that only allows apps from the Microsoft Store to be installed. To install Virtual TimeClock, you will need to permanently switch out of S mode. You can do this in three easy steps:
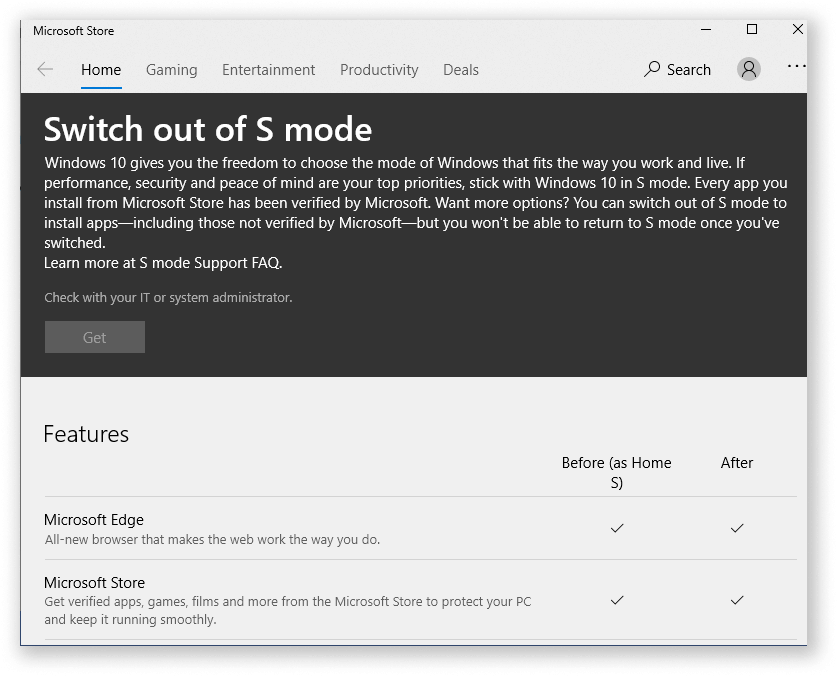
- On the computer running Windows 10 in S mode, open Settings > Update & Security > Activation.
- Find the Switch to Windows 10 Home or Switch to Windows 10 Pro section, then select Go to the Store link.
- On the page that appears in the Microsoft Store (Switch out of S mode or a similar page), select the Get button. After you confirm this action, you will be able to install Virtual TimeClock.
For more information on how to install Virtual TimeClock on a new computer, check out our detailed moving guides for step by step instructions.