Virtual TimeClock Knowledge Base
Automatic Time Additions & Deductions
The Automatic Time Additions & Deductions feature in Virtual TimeClock can be used to automatically add or subtract time from an employee's timecard. This feature is commonly used for automatically deducting lunches or breaks from an employee's timecard. This article will cover how to create a new auto time rule, how to delete a rule and how to reverse an automatic time deduction.
Note: This feature is only available in Pro and Network editions.
Creating an Auto Time Rule
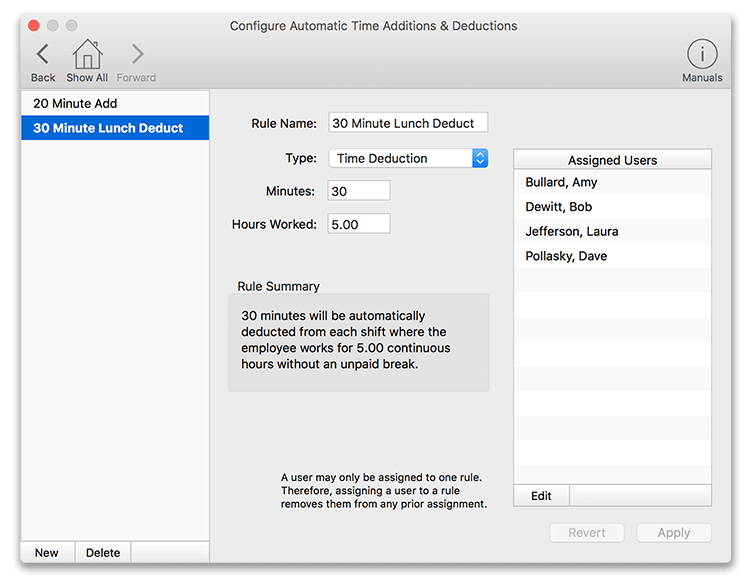
Virtual TimeClock includes one default time deduction rule. You can edit this rule, or add more rules that are specific to your business. Rules will apply to all assigned users whenever the rule conditions are met.
- Select Turn Administration On from the File menu.
- Choose Add/Deduct Time from the Configure window.
- Select New Rule at the bottom of the rule list.
- Enter a Rule Name and select the Type, Time Addition or Time Deduction.
- After entering the rule parameters, review the Rule Summary for accuracy and choose Apply.
Note: Clocking out or taking an unpaid break will disrupt the "continuous hours" worked and prevent the rule from applying.
- Assign the new rule to individual workers by choosing Edit in the Assigned Users list and selecting users.
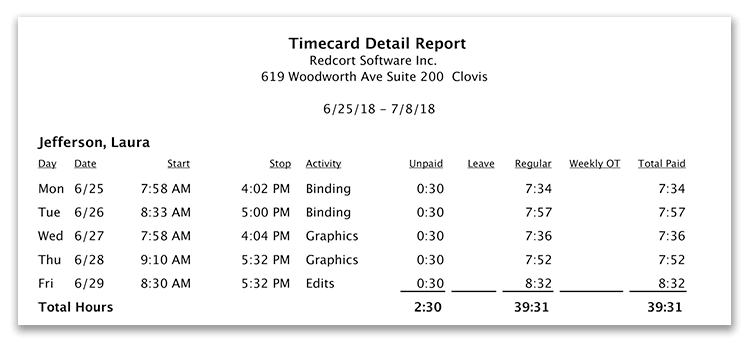
The timecard report below shows how the above auto time deduction rule will appear on a timecard, note the Unpaid hours column.
You can delete an automatic time addition or deduction rule, but exercise caution because doing so will remove all the time added or deducted from employee timecards in the current open payroll period. To delete an auto time rule, select the rule in the left column and click Delete at the bottom of the list.
Reversing an Automatic Time Deduction
If an employee works through lunch or takes a shorter lunch than usual, you will need to add the time back in by creating a paid activity.
- Select Turn Administration On from the File menu.
- Select Activities from the Configure menu.
- At the bottom of the activities list, click Add to create a 'Worked Lunch' activity.
- Set the status to Manual Entries Only and mark it Paid.
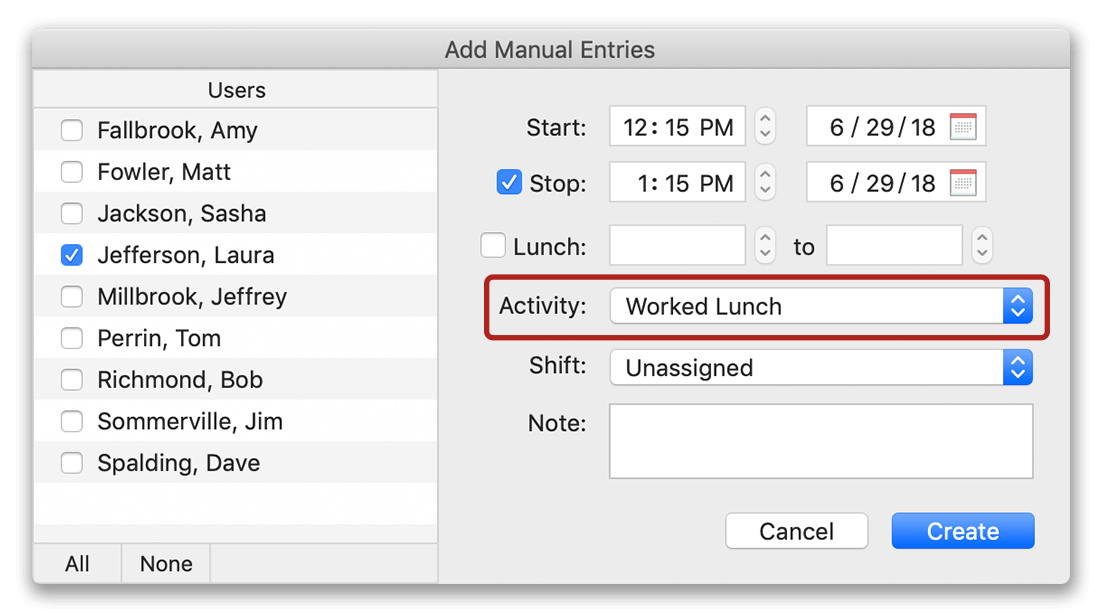
- Return to the In & Out Board and select the Add Entry icon.
- Add a new entry for the worker using the new 'Worked Lunch' activity. The Start time and Stop time should cover the amount of time that was deducted.
- View the employee timecard to ensure accuracy.
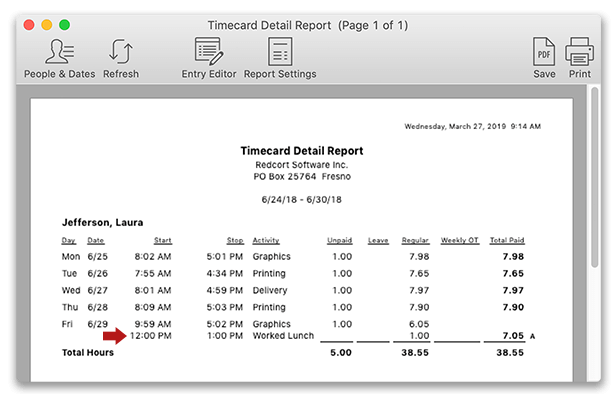
Note: You will still see the automatic time deduction on the employee's timecard, but there will also be a 'Worked Lunch' entry adding the time back into the total hours worked.
Auto time rules are a simple way to handle regular automatic time additions and deductions for your employees. Remember that these auto time rules only apply to the current payroll period and will not apply retroactively to timecard entries in closed periods. We highly recommend closing the payroll period before making any changes to auto time rules and assigning or reassigning users to different rules. Learn more about the payroll periods in Virtual TimeClock.