Virtual TimeClock Support Blog
Backing Up to Google Drive
July 2, 2018
Backing up your Virtual TimeClock database to Google Drive is a simple, free way to ensure you won't lose valuable time clock data in the event of a stolen, lost or broken computer. Keep reading for complete steps on how to easily set up cloud backups with Google Drive.
Note: Automatic, scheduled backups are only available in Pro and Network editions of Virtual TimeClock.
How to Backup to Google Drive
Pro Edition users should follow these steps on the same computer as the TimeClock. Network Edition users should follow these steps on the computer that runs the TimeClock Server.
- Create a new folder on the desktop and name it "VTC Backups"
- If you do not have a Google account, create a free account.
- Download and install the Google Backup and Sync tool.
- In Step 2 of the installation, uncheck the boxes next to Desktop, Documents and Pictures.
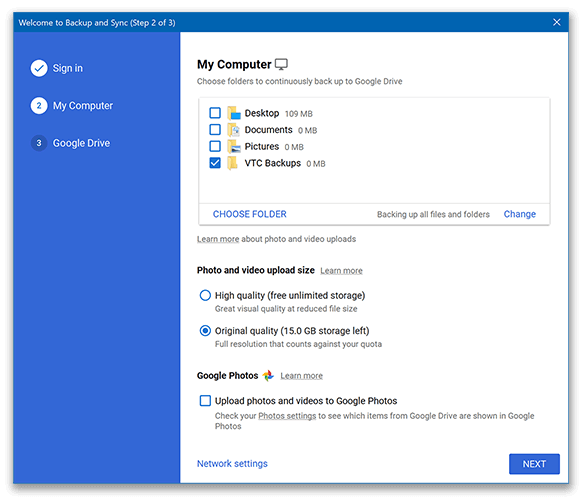
- Click Choose Folder, select the VTC Backups folder on your desktop and click Next.
- Uncheck the box next to Sync My Drive to this computer and choose Start.
- Open Virtual TimeClock and select the Backups feature.
- Pro Edition: Configure > Backup Schedule.
- Network Edition: In the Server Manager choose the Backup tab.
- Under Backup Folder, select the VTC Backups folder on your desktop. Configure your schedule then click Apply.
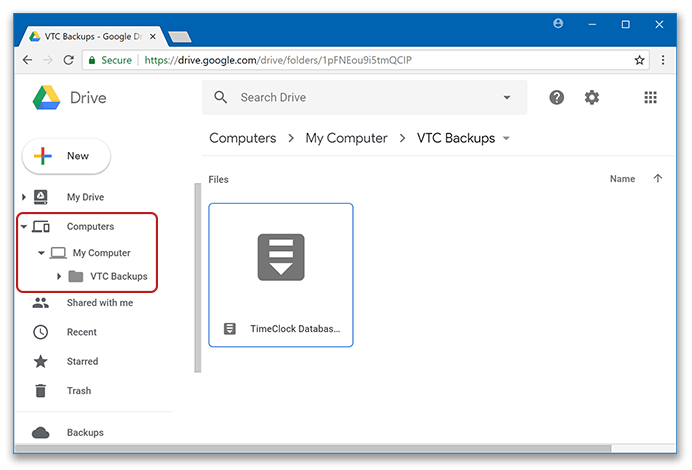
- Verify that your backup schedule is working by checking the Google Drive folder.
- In Google Drive, choose Computers > My Computer to see the VTC Backups folder.
For more information about Virtual TimeClock backups, review the Backup articles in the Knowledge Base.