Virtual TimeClock Knowledge Base
Assigning Overtime Rules to Users
Setting up overtime in Virtual TimeClock Pro and Network editions is a two step process. You first create overtime rule(s) and then you must assign a rule to each user that earns overtime. See our creating overtime rules in Virtual TimeClock if you have not already setup your overtime rules.
Assigning Overtime to Multiple Employees
- Select Turn Administration On from the File menu.
- Select Overtime from the Configure menu.
- Choose the desired overtime rule on the left column of the Configure Overtime window.
- Click Edit in the Assigned Users list and select employees for the rule.
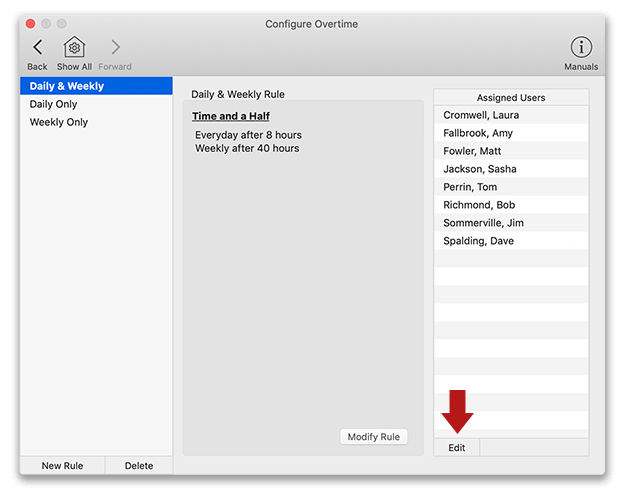
Note: Users can only be assigned to one overtime rule. Assigning a worker to a new rule replaces the prior overtime rule assignment.
- Select Save Changes when finished.
Assigning Overtime to One Employee
- Select Turn Administration On from the File menu.
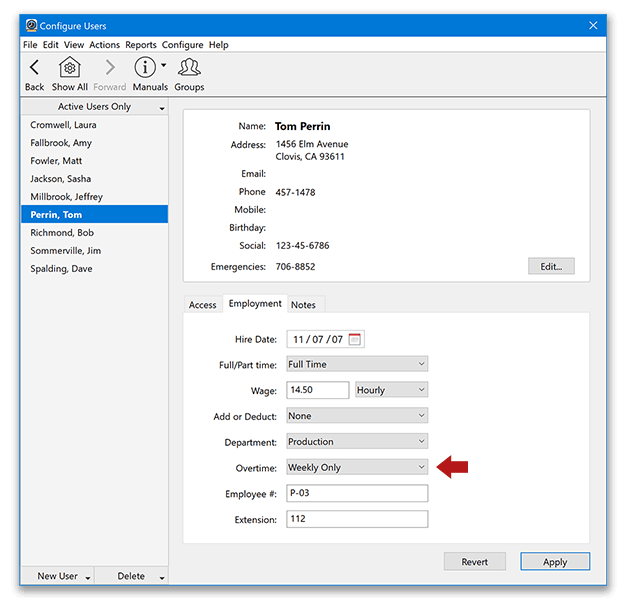
- Choose Users from the Configure menu.
- Select a worker from the user list and click the Employment tab.
- Select an overtime rule from the Overtime popup menu and click Apply.
Salaried Worker Overtime
Historically, salaried workers were exempt from overtime, meaning salaried workers (by definition) never earn overtime premium pay. Because of this, any overtime rule assigned to a salaried worker is ignored by the program.
However, employees that are classified as 'salary non-exempt' do earn overtime. In order to calculate overtime for these non-exempt workers, they must have their status set to Hourly in Virtual TimeClock.
To change a worker status from Salaried to Hourly:
- Select Turn Administration On from the File menu.
- Select Users from the Configure menu.
- Select the user name in the left column.
- In the Employment tab, change the workers' wage status to Hourly.
- Select Apply.